
My Illuminated Stainless Steel World Map
Renovation as an Opportunity for an Illuminated World Map
The Idea Behind My DIY Project
Renovation as an Opportunity for an Illuminated World Map for the Wall
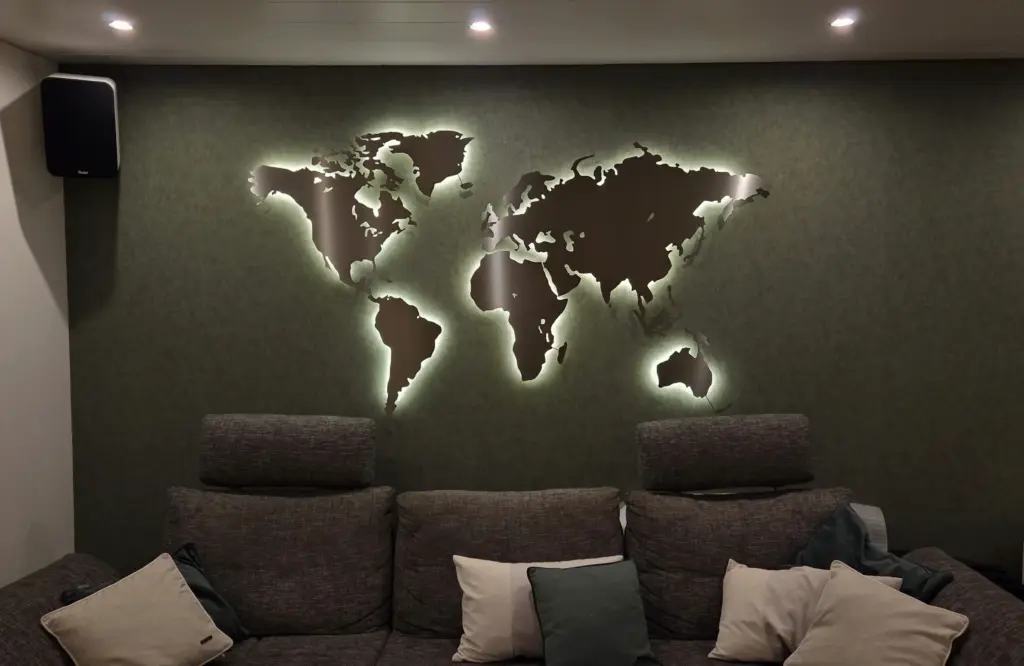
During the renovation of my living room, I took the opportunity to install my illuminated stainless steel world map and neatly conceal all the wiring within the wall. For me, this project was the perfect moment to add a modern highlight to my living space. Perhaps it can also inspire others to create their own illuminated world map – regardless of the material or size.
Drilling Template, Cable Routing, and Positioning
Preparing the Wall for the Illuminated Wall Décor
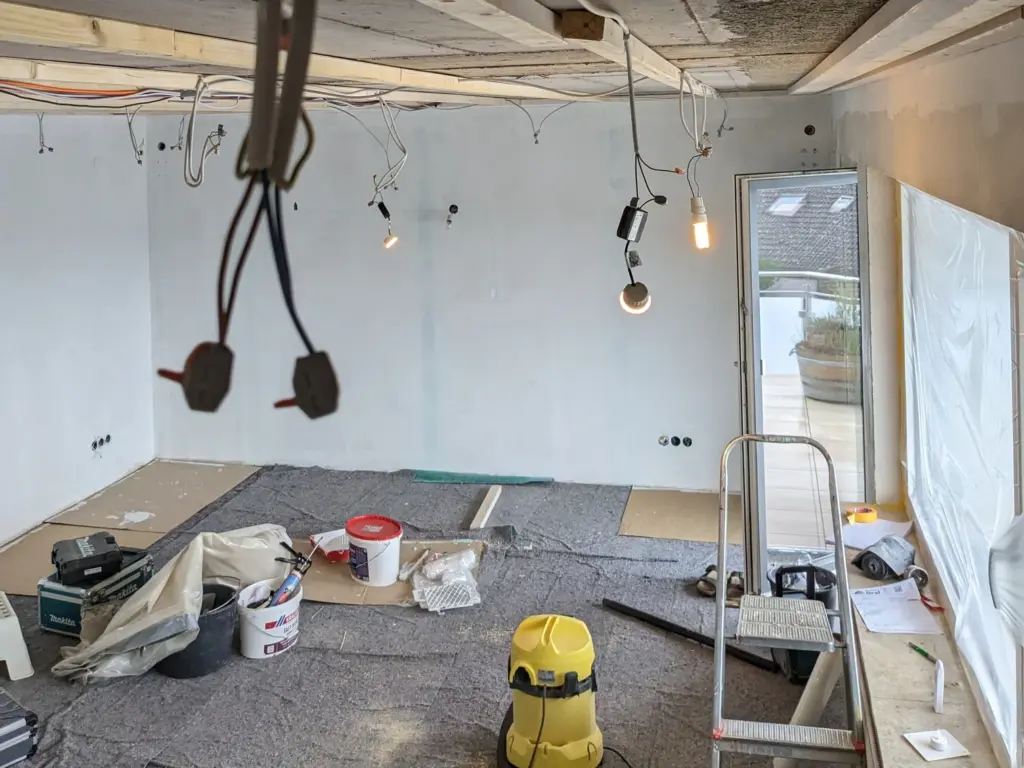
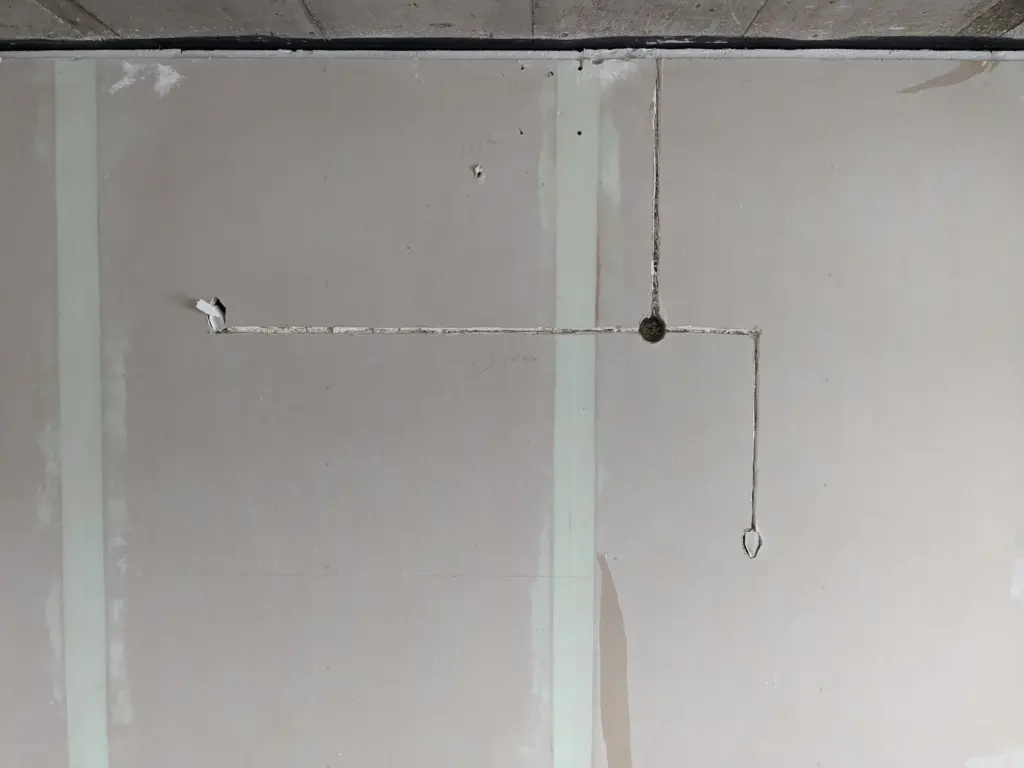
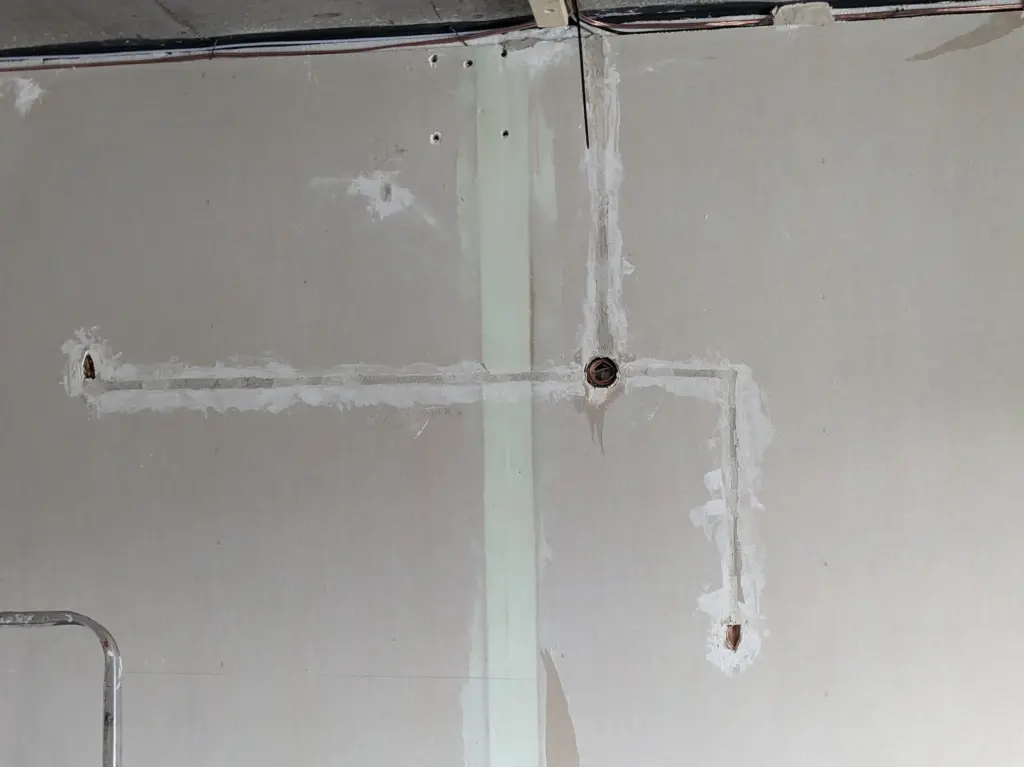
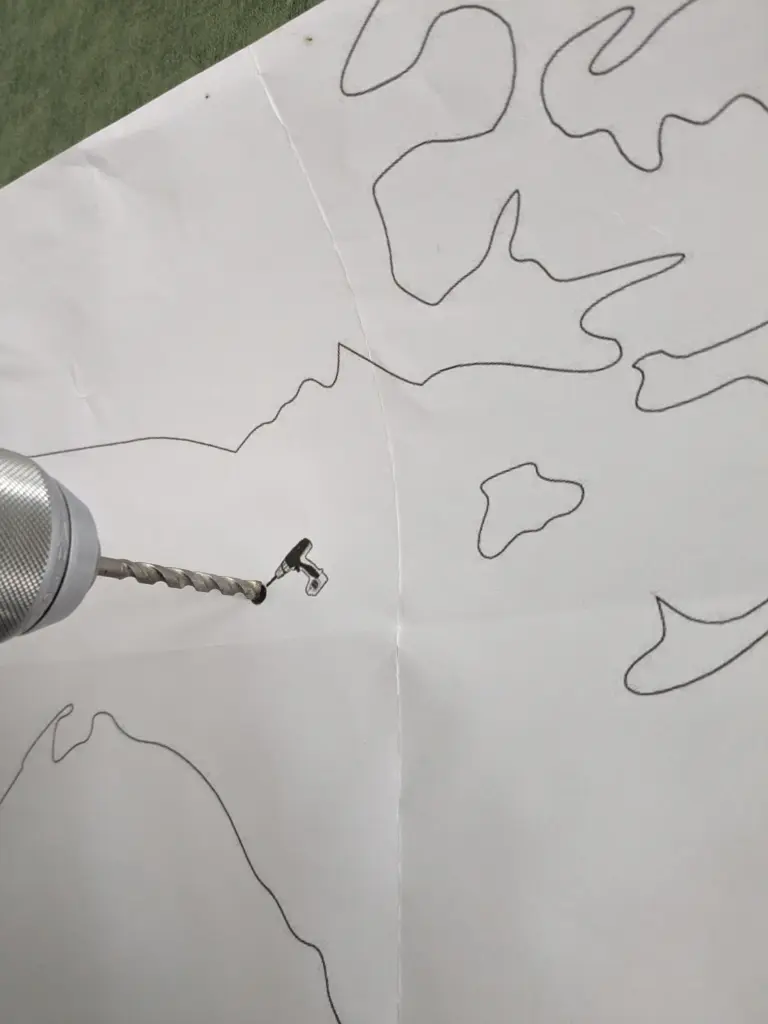
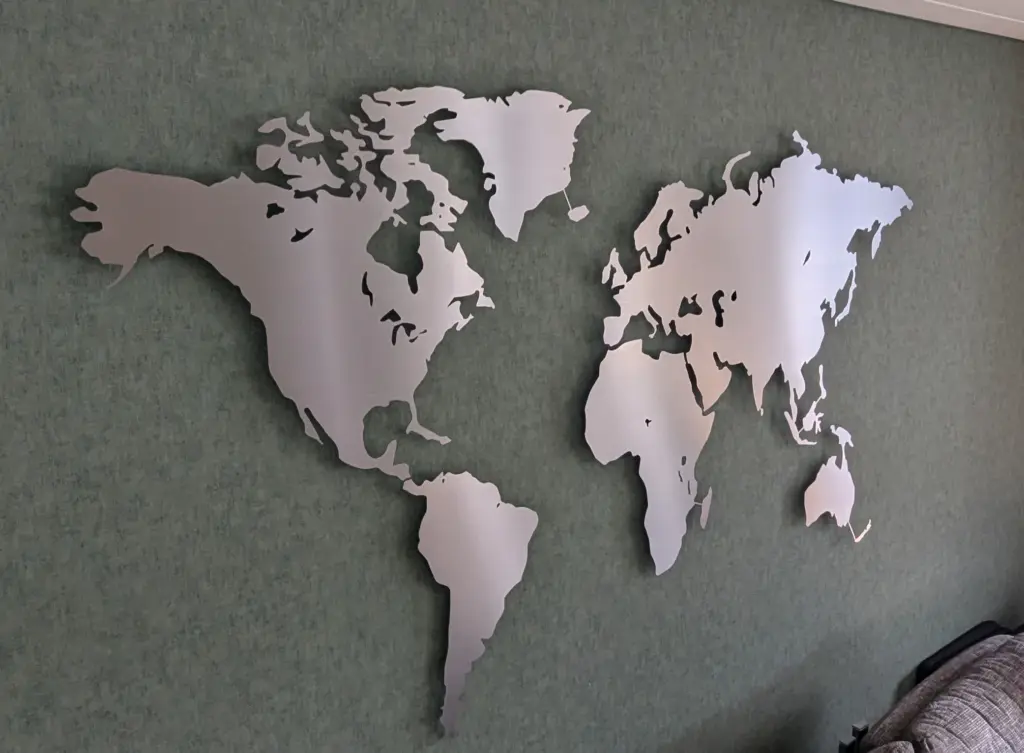
After we had stripped the living room back to its shell, I first used the drilling template to determine the perfect position for the illuminated world map on the wall. I then marked the spots where the junction boxes would later be installed. After that, the necessary cable channels were milled into the wall—after all, I wanted to control my illuminated world map conveniently via a light switch.
Junction Boxes, Power Supply, and Electrical Routing
Cable Routing for a Clean In-Wall Installation
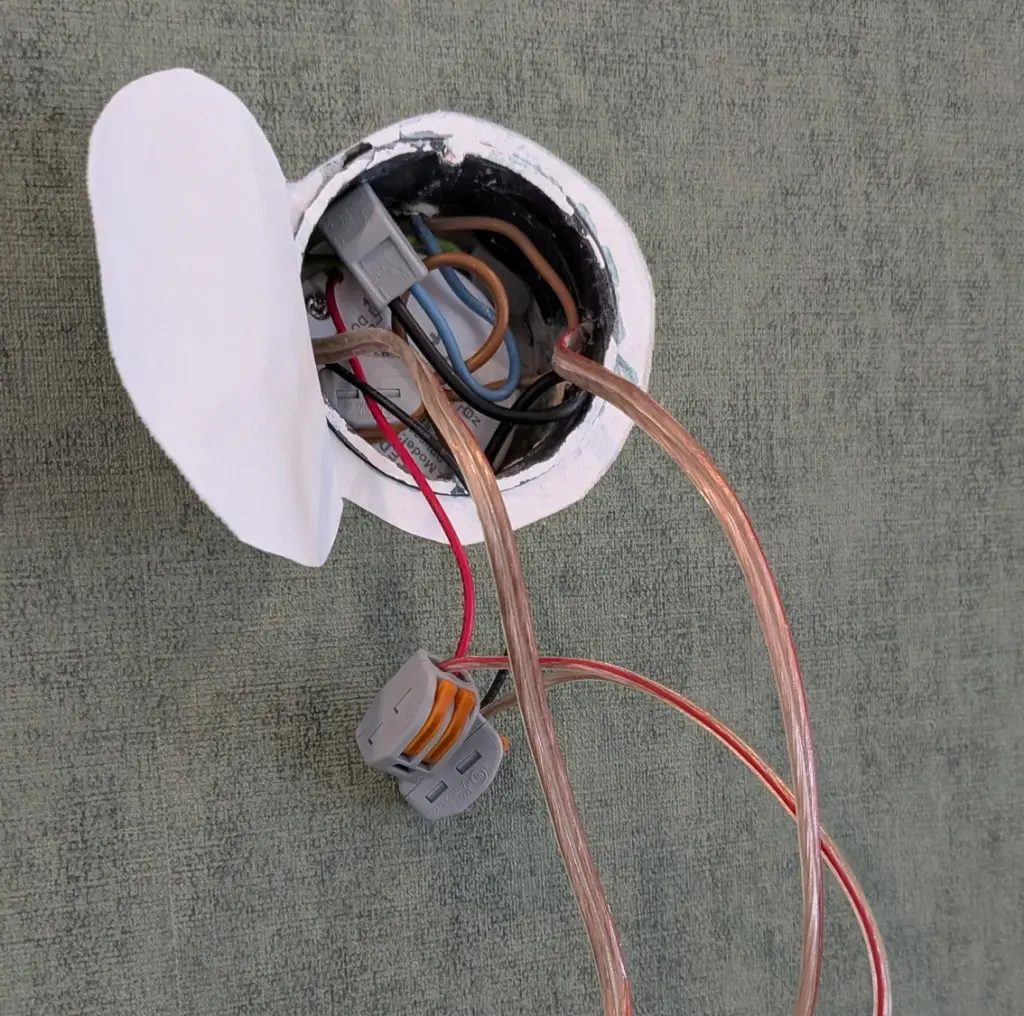
In my setup, the main power supply runs from above into the central junction box, which is later concealed behind Eurasia. From this box, I routed a two-core cable to each of the two additional junction boxes. Once all cables were in place, the opened channels were plastered over and the living room was freshly wallpapered—creating the perfect foundation for a clean installation of my illuminated world map wall décor.
Markings, Planning, and Light Routing
Preparing the Metal World Map for LED Lighting
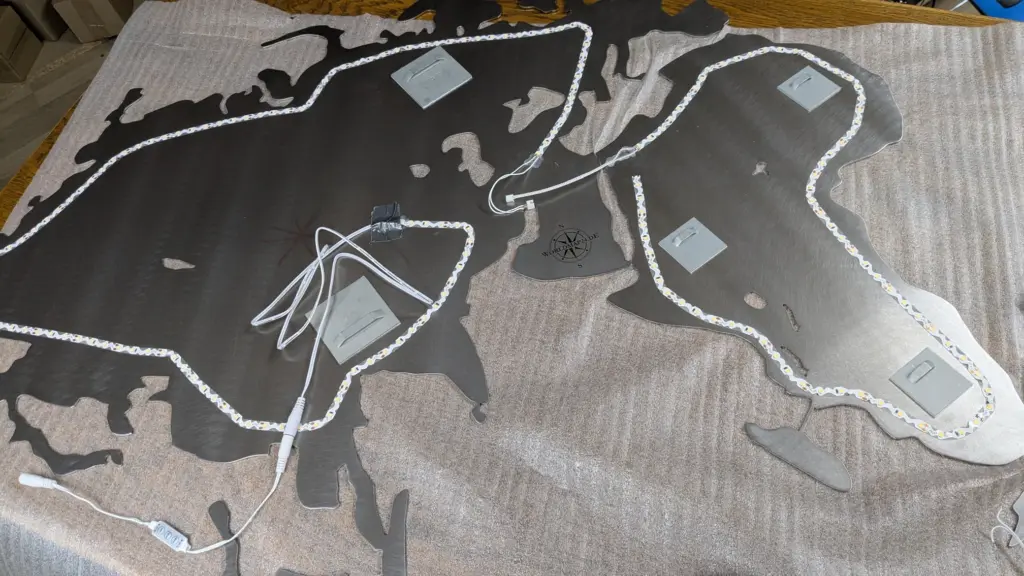
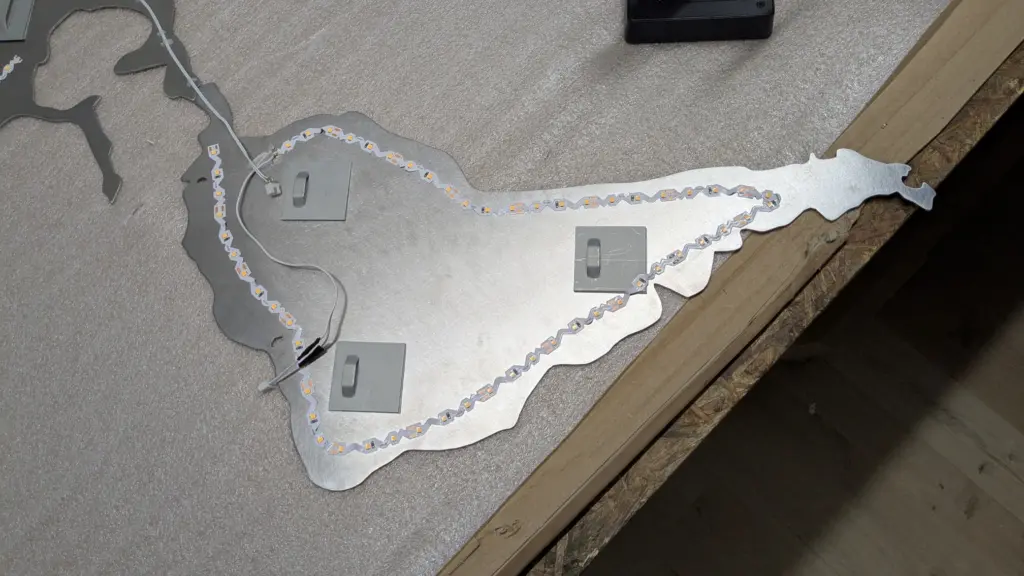
In parallel with the renovation, I prepared the actual map. To do this, I precisely marked the areas where the junction boxes would later be located, ensuring that no LED strip would run in these spots and that no unsightly shadows would be created.
Why I Chose the Paulmann FlexLED
The Right LED Strip for Perfect Illumination
I chose a warm white Paulmann Function FlexLED strip—which, in my view, is ideal for world map LED lighting, as it can be laid easily around tight curves without needing to be cut.
Practical Preparation for Mounting and Removal
Plug Connections for Flexible Mounting
To make later mounting and removal easier, I crimp small connectors onto each end of the LED strips. This allows even a complex illuminated metal world map to be wired cleanly and modularly.

Marking Drill Points, Installing Mounts, and Exposing Junction Boxes
Mounting the Illuminated World Map on the Wall
After the renovation, I realigned the drilling template so that all junction boxes would later be concealed by the world map elements. I then marked the drill points, inserted the supplied Fischer wall plugs, and screwed the mounts into the wall.
Clean Power Distribution for Even Lighting
Connecting the LED Power Supply for the Illuminated World Map
Using a utility knife, I carefully opened the junction boxes and pulled out the connection cables. The in-wall LED power supply is located in the main junction box and distributes power via two outputs—ideal for my illuminated world map.
Teamwork for Safe and Precise Installation
The Big Moment of Hanging It Up
Then came the big moment: mounting and connecting the illuminated world map on the wall. For this step, I strongly recommend having two people—installing and wiring the illuminated wall world map at the same time is much more relaxed and manageable with a second pair of hands.
Indirect Lighting That Transforms the Room
An Impressive Result with a Warm Atmosphere
Das Endergebnis begeistert mich bis heute: Die beleuchtete Weltkarte sorgt besonders abends für eine warme, indirekte Beleuchtung und eine außergewöhnlich gemütliche Atmosphäre. Die Kombination aus Edelstahl, Licht und schwebender Optik macht die Karte zu einer eindrucksvollen Wanddeko Weltkarte beleuchtet – modern, elegant und absolut einzigartig.